- Features
- Description
- Similar Items
Double Threads
FABRICS THAT CANNOT BE STITCHED: Thick fabrics like denim, velvet and other thick fabrics
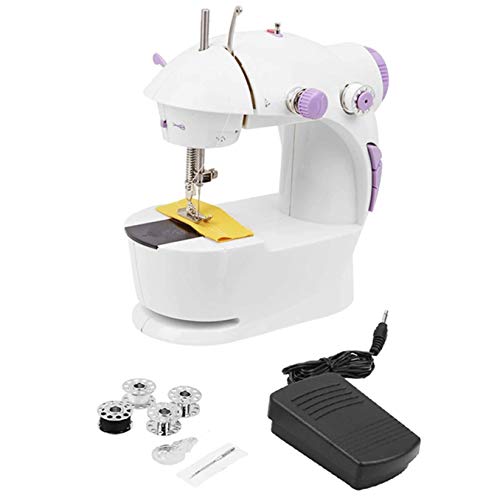
Accessories : 4 x Metal Bobbins, 1 x Foot Pedal, 1 x Needle, 1 x Needle Threader
Adjustable Straight Stitch and Reverse Sewing - Practical Mini Machine for Mending, Hemming and Basic Sewing
FABRICS THAT CANNOT BE STITCHED: Thick fabrics like denim, velvet and other thick fabrics
Accessories : 4 x Metal Bobbins, 1 x Foot Pedal, 1 x Needle, 1 x Needle Threader
Adjustable Straight Stitch and Reverse Sewing - Practical Mini Machine for Mending, Hemming and Basic Sewing
Binding:
Brand:
HBMALLINDIAEAN:
0695528888898Label:
Manufacturer:
Model:
Size:
MINIWarranty:
OPERATING THE MACHINE TO USE THE FOOT PEDAL: 1. Make certain machine is in "Off" position. 2. plug the foot pedal jack (M) into back of machine . 3. Turn machine on by pressing the foot pedal. 4. Press gently on the foot pedal to run the machine. Let up to stop. When you are finished sewing a seam, ease your foot up and off of the foot pedal. Note: The on-off switch on the machine should be in the "OFF" position when using the foot pedal. ADJUSTING TENSION: 1. You should not adjust tension. Tension for maximum performance has been set and adjusted at the factory However, if you should find that stitches are too loose or too tight, you can adjust the stitch 2. Loosen stitch by turning the tension screw (N) counter-clockwise 3. Tighten the stitch by turning the tension screw (N) clockwise. Sewing heavier fabric may require loosening the stitch. Very light fabric may require tightening the stitch. Bobbin tension cannot be adjusted. CHANGING THE NEEDLE: 1. Turn the hand wheel (K) clockwise to raise the needle (R) to its highest position 2. Loosen the needle clamp screw (O) by turning it counter-clockwise (toward you) You may need to use a short slotted screwdriver or small players. 3. Remove the needle (R), pulling down, away from the needle clamp (P). 4. Place the new needle with the flat side facing in against the needle clamp (P). 5. Push it gently as far up as it will go, and against the needle clamp (P). 6. Tighten the needle clamp screw (O) while holding the needle (R) in place Note: Needles come in various sizes designated by numbers. They designate the left of the needle. The smaller the number. the thinner the needle. Use smaller eedles for more delicate fabrics and larger needles for heavier fabrics.


