- Features
- Description
- Similar Items
Exclusive Heat-Active Alloy: Allows electrodes to reach optimal temperature quickly and remain stable under all engine loads
Works with Any Engine Type: Greatest engine performance regardless of engine type or ignition system
Maximum Power: With faster throttle response and focused spark
Compatible with the Following Applications: Acura, Audi, Chrysler, Dodge, Honda, Jeep, Mitsubishi, Porsche, Ram, Volkswagen.Seat Type: Gasket
Focused spark for maximum power
Exclusive Heat-Active alloy maintains stable operating temperature under all load conditions
Faster throttle response
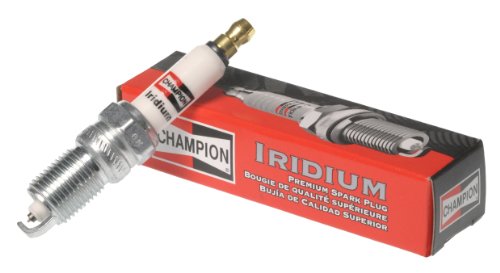
Champion Iridium - the ultimate element. This spark plug’s fine-wire iridium center and platinum ground electrodes provide the sharpest spark focus for maximum performance. Compatible with passenger car, light truck and powersport applications, the exclusive heat-active alloy allows electrodes to reach optimal temperature quickly and maintains stable operating temperature under all load conditions.
Step-by-Step Instructions for Installing New Spark Plugs
Step 1
If necessary, set the gap on the new spark plug before installing it. In the past, it was necessary to use a gapping tool to make sure the gap in the spark plugs was the correct size. Today, Champion spark plugs come pre gapped, eliminating the need for this step most times. You should double check that the gap is correctly set; check your owner’s manual to find the distance for the spark plug gap and use a gap gauge or feeler gauge to check the distance.
Step 2
Seat the new spark plug by hand; turning it clockwise at least two full turns. Once you have the spark plug snug, use the socket wrench with extension and spark plug socket to tighten it turning the plug clockwise. The plug’s washer should be pressed against the mounting surface.
Take care not to over tighten the plug; you can strip the thread on the head of the engine leading to costly repairs. You can also use a torque wrench to torque it to specification (OE service or repair manual).
Step 3
Replace the spark plug wire boot or ignition coil and wiring connector. A plastic boot should click into place while a rubber boot may require a coat of dielectric grease on the inside of the boot for easy removal next time.
Step 4
Repeat the removal and installation process for each spark plug. That’s all there is to it! If at any point you run into issues or have a question, consult your mechanic.
These instructions are for informational purposes only and should not be used in lieu of seeking professional advice from a certified technician. We encourage you to consult with a certified technician if you have specific questions or concerns relating to any of the topics covered herein.


